
17 months after it was required to be adopted per the EEB Act, the 2021 Energy Code has now officially been adopted. JCAR approved it November 7th & the CDB gave its final approval. Thus, starting January 1st, 2024, all newly permitted projects are required to be built per the 2021 Illinois Energy Code. For […]

Wacky Weds: There will be some tree trimming in your area today…
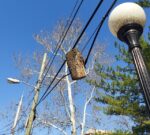
So the electric company is required to send out notices that tree trimming work will be happening in your area (even if your power lines happen to be underground – ask me how I know) With that said, one has to wonder – just how long it was between trimmings when you see this:
Wacky Weds: Nothing to see here…
Yes folks – that is a corrugated gas line going through a door across a walkway shared with others…
Wacky Weds: I’ll be Working Outside Today
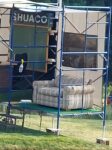
Desk, Chair, Coach, Shade… check Sorry folks this isn’t an OSHA approved setup but it does get an A for originality. (OSHA Standard)
Know thy Numbers: Smoke Detector Placement
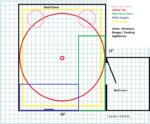
For anyone building, remodeling, or altering a house one quickly learns that the code is full of numbers. From insulation minimums to stair maximums just trying to keep track of them can be daunting. One exception is with the placement of Smoke Detectors and to a lesser extent Carbon Monoxide detectors. Oh sure they basically say […]
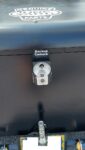
Wacky Weds: Circuit Breakers Optional
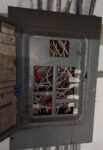
Heh, who needs circuit breakers? Ok yes, I know they are using the old panel as a junction box but wow… besides the mess there are just a few other issues to be dealt with.
2021 Illinois Energy Conservation Code – Moving Forward
For anyone following the Illinois adoption of the Energy Codes, the timelines given are generally pretty optimistic though per the ACT the deadline isn’t… Well welcome to Illinois and wow has this version taken things to a whole new level. Here is an abridged version of the timeline when the whole process kicked off: June […]
Wacky Weds: Ducks & Ducts – Again?
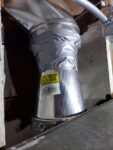
Today we have a twofer but first, one more time please – duct tape has a 1,001 uses but using them on ducts isn’t one of them. The first one is hilarious not only because they actually used the correct tape for part of this contraption but the contraption itself & of course the duct […]
Wacky Weds: Next Level 3 R’s
Reduce, Reuse, Recycle or is it just another person’s junk is another person’s treasure? If you think this is good, you ought to see the rest of this truck.
Wacky Weds: Can the directions be any clearer?
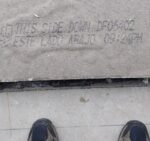
I don’t know but this appears to be pretty clear in not only Spanish but English…
- 1
- 2
- 3
- …
- 89
- Next Page »